Design resources
Designing with Web
There’s no need to reinvent the wheel
Using design resources
The nice thing with learning web is the unlimited resources available. From forums like StackOverflow where you'll find the answers for all your questions about code, communities like CodePen, to sites like The Noun Project that provide icons for everything. We can also find fun gifs, subtle patterns or beautiful free photos for our pages (have a look at Stock photos that don’t suck for more).
But let's get back to CSS: from background gradient generators to box shadow generators, there also exist a lot of different resources to spice up our pages.
Typography
Using CSS, we've seen that we can change the font of elements using font-family with one of the following values:
- serif (that's the default font-family)
- sans-serif
- fantasy
- cursive
- monospace

Pretty boring, right? Thankfully, we can access to a lot more of options via Google Fonts.
To use a Google Font, we select that font, then we click on the selected fonts menu in the top right corner:
There we can copy the code for a link element to add in our page:
<link href="https://fonts.googleapis.com/css?family=Lobster" rel="stylesheet">And the CSS rule for the elements that should use this font:
font-family: 'Lobster', cursive;
Here we are using a link element to access the font, then in our style element, we are using a rule that refers to this previous link element.
Note: I used a style element so that we can see the whole code on a single file, but we could also have put our CSS rules in a second link element.
"The quick brown fox jumps over the lazy dog" is an English-language pangram — a sentence that contains all of the letters of the alphabet. It is commonly used for touch-typing practice, testing typewriters and computer keyboards, displaying examples of fonts, and other applications involving text where the use of all letters in the alphabet is desired. Owing to its brevity and coherence, it has become widely known. (from Wikipedia)
For more details about Google Fonts usage, I suggest you to read A Beginner’s Guide to Using Google Web Fonts.
Combining fonts
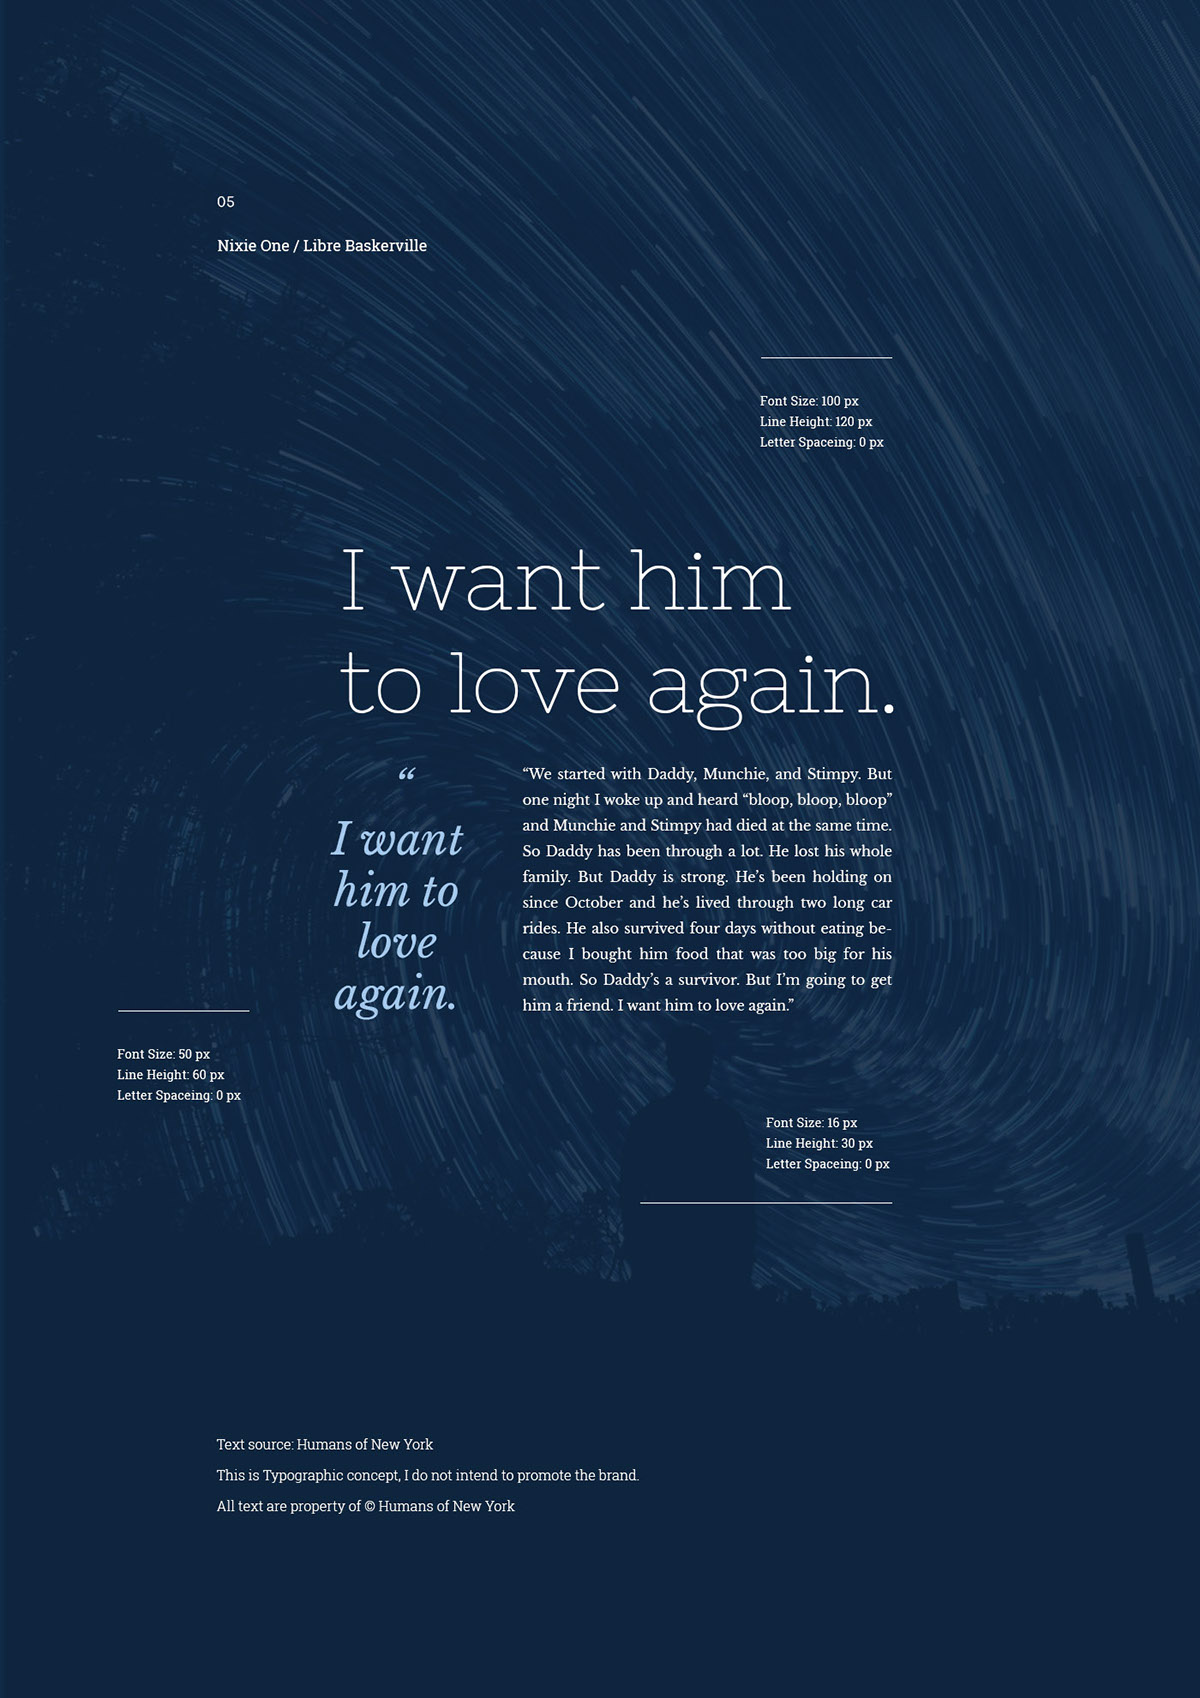
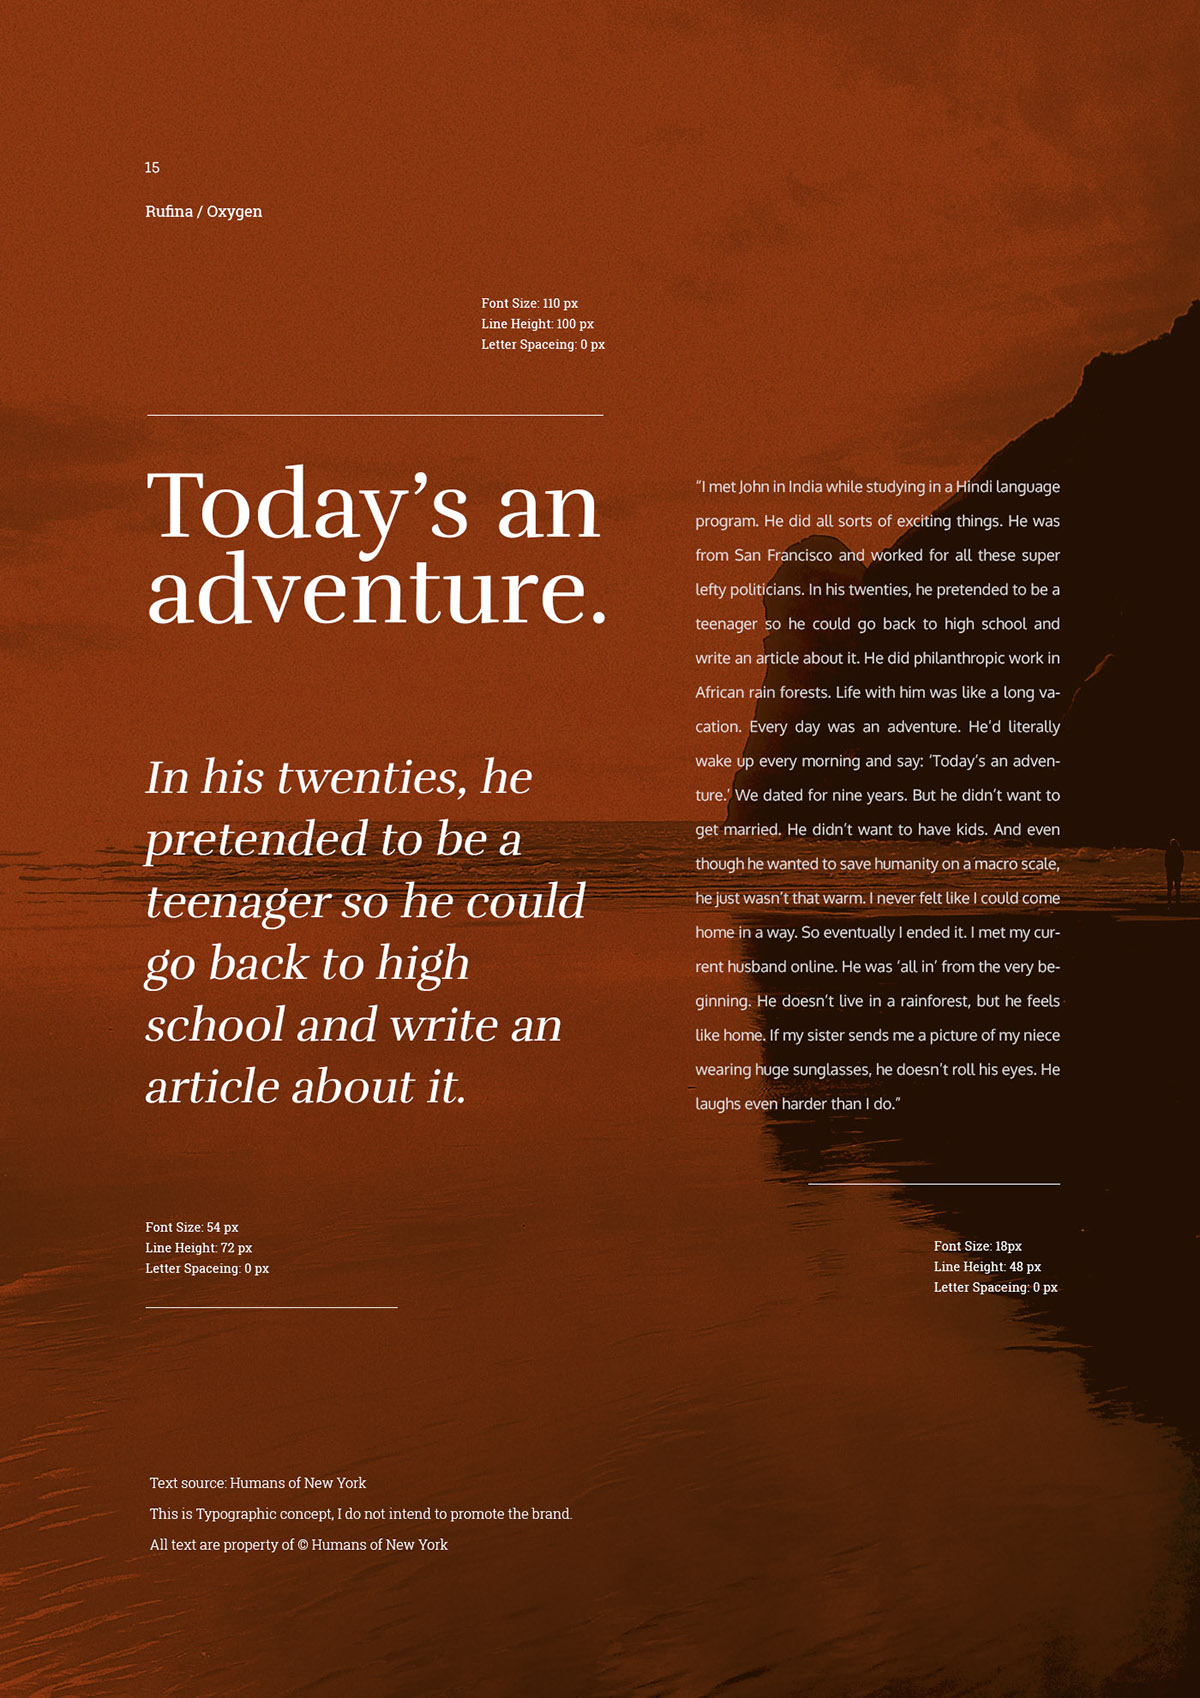
We can use multiple fonts to provide more contrast between elements like titles and common text, but it is usually recommended to not use more than two font families, it's much better to create variations using different weights (thin, medium, bold, ultra…). And since combining fonts requires a certain knowledge in graphic design, here are some links to help you:
Icons
We can also access to a lot of free icons using fonts like Font Awesome.
For this, we first need to add a link element to Font Awesome CSS file:
<link rel="stylesheet" href="https://use.fontawesome.com/releases/v6.0.0/css/all.css">Then we can search for an icon, copy the given code, and insert it in our page:
Greyed icons require the paid version of FontAwesome.
The Font Awesome CSS file contains many CSS classes that we use to display the icons we want: fas stands for Font Awesome Solid and fa-paper-plane stands for the codename of the icon to use.
Note: An element with multiple classes only has one class attribute with several classes separated by spaces. For example, an element with multiple classes would look like this: element class="class1 class2 class3"
Ok, typography and icons are nice but we still need tools for layout.
CSS Frameworks
Writing homogeneous CSS for all our elements or creating complex responsive layout can be pretty tedious. Fortunately, developpers have written CSS frameworks, a lot! (See 100+ Best CSS Frameworks For Responsive Design)
A CSS framework consists in a set of styles for elements, pre-defined classes to customize elements and components to create menus, navbars, headers, footers, grids and more. It helps creating websites with consistent styles and provides solutions for dealing with common problems like grids, forms, responsive design…
First, we're going to use normalize.css, a CSS stylesheet that makes browsers render all elements more consistently and in line with modern standards.
Uncomment line 10 👆👆👆
This may not seem much different at first, but all the small differences between default styles implemented for each browsers have now disappeared.
Now that our elements are normalized, we're going to add Skeleton, an open source CSS framework (source code on Github) that provides modern styles for elements (typography, colors, borders…) and solutions for responsive layout (it can adapt elegantly to any screen size).
Uncomment line 12 to include Skeleton to our HTML doc 👆👆👆
And voila! Our page already looks different due to Skeleton's basic styles. Here, Normalize first overwrites default styles, then Skeleton add its own styles.
Try to add a list as documented on Skeleton's page.
Skeleton provides a container class to layout content in a centered column:
To sum up, you can either choose to use the container class to keep your elements in a centered column or not use it to keep your elements full width.
We can also wrap elements with a container class inside a full width element:
A lot of websites uses this kind of technique to create full width headers/footers while preventing text from escaping the user's attention zone.
Using the container class creates a better a layout but the most useful feature of Skeleton is its grid, a 12-column fluid grid with a max width of 960 pixels, that shrinks with the browser/device at smaller sizes. The syntax is simple and it makes coding responsive web pages much easier:
Click on the  button, then resize your browser and observe how columns evolve according to the app width.
Play with the grid and create a new .row with some .columns and add some elements inside.
Grids are very important tools and are used on every sites: look at Facebook, Twitter, Instagram, or even this course.
Skeleton is nice and minimal, and helps understanding how to work with frameworks. While it provides only the essentials, there exists a lot of other CSS frameworks, more complete but less simple to use, offering more utility classes and complex components, here are two useful and beginners friendly ones:
- Bootstrap, developped by Twitter
- Materialize, the frameworks used for this course
But keep in mind that Skeleton is enough for most of our needs.
Mixing everything
With all we've seen until now, we can now create elements and style them using CSS frameworks, grid, typography and custom rules, and create simple and elegant layouts for our content:
A last class from Skeleton that is really usefull is the u-full-width class: Elements with this class scale proportionnally until their width is equal to the one of their parent.
For example, an image width the u-full-width class inside a column will adapt its width to the one of the column:
And that's it with Skeleton 👏 !
If you need more resources about Skeleton, you can consult Building HTML Page Structure With Skeleton, Getting Started with Skeleton, or if you'd rather watch videos, there are playlists available on Youtube like Skeleton CSS Tutorial or Skeleton CSS Boilerplate Tutorial.
You now have all the tools to create nice layouts! And just like we did with HTML, we can use Developer Tools (right click on the page → "Inspect") to observe, modify and learn CSS in the sites we visit:
Sum up
- Do not try to reinvent the wheel.
- Many frameworks and tools are open-source.
- Before trying a tool check if the documentation is well written.
- Think in terms of modularity: classes are better than ids.
- Write re-usable code.
- Search solutions on the web, others have already been confronted with our problems.
Resources & going further
- fontjoy: Generate font combinations with deep learning
- Design inspiration on Behance
- Web inspiration on Dribbble
- Building HTML Page Structure With Skeleton on tuts+
- Getting Started with Skeleton on sitepoint
- Skeleton CSS Tutorial on Youtube
- Skeleton CSS Boilerplate Tutorial on Youtube
Quiz
Test your knowledge
This quiz is mandatory. You can answer this quiz as many times as you want, only your best score will be taken into account. Simply reload the page to get a new quiz.
The due date has expired. You can no longer answer this quiz.
HTML and CSS Project
HTML and CSS Assignment
This assignment is mandatory. If you update your work but the link doesn't change, you don't need to re-submit it.
Make sure you're always connected to your Glitch account when working on your assignment. All work done without being connected can't be verified and therefore might be graded with a 0.
Instructions
Let's imagine a concrete scenario: your manager just emailed you a PDF file containing information that you now have to turn into a webpage. Here's that email:
Hello 👋
Here's the link to the PDF we talked about earlier today, simply click to download: [Not loading? Please reload the page]
For this assignment, you have to use the data (text and images) that was provided and put it together in a web page, using HTML and CSS. As you can see, this PDF file is pretty raw, so you should come up with your own styling. You get to decide fonts, colors, layout, icons, additional images, etc! If you'd like to, and if it's relevant, feel free to add other kinds of media: sounds, videos, iframes…
One styling rule that you have to follow, however, it that you need to use Skeleton's rows and columns to lay out some elements side by side.
Your project should: To validate, your project must:
- use the data that was provided to you
- include media uploaded to Glitch (either images/videos/sounds)
- use Google Fonts
- use Skeleton's grid (
rowandcolumnsclasses) - use your own CSS rules in "style.css" (Skeleton is not enough)
Validation criteria
This assignment is the first half of your evaluated work for Part 1: Basics, which you will finish in the JS - Libraries chapter.
It will not be graded as is. However, make sure to fulfil the criteria below, as they are required for the evaluation.
You still have to submit this assignment in the submission box down below before the deadline.
Use of resources
Integration of medias (images/videos/sound), Google Fonts
Use of Skeleton
Use of Skeleton's grids and classes
HTML & CSS quality
Use of right HTML elements + custom CSS + code clarity
Going further
Navigation (menu, breadcrumbs, pagination, etc.), accessibility (colors, font sizes, alt tags etc.), CSS animations and transitions…
Resources
You can start by remixing this simple Glitch project, then click on the button:
If you'd rather start from scratch, you can go to Glitch, make sure you're connected and create a new project using the hello-webpage template:

Submit your assignment
When sharing your Glitch projects, copy the link for the result (not the editor view). Then, simply paste that link in the submission box down below. 👇
The due date has expired. You can no longer submit your work.
Wow, you're doing great! You've already been through structuring data, creating web pages and styling them using different languages. You've started to think about open source, and you can already communicate about any project using web technologies.
The next part of this course will bring us to a whole new dimension, and is about automating, interaction, dynamic data, flows… We're going to leave static pages and start Programming the Web.